Yoga exercise is the mixture of fitness and
meditation. The best part about it, is that no matter what your weight is or
where you want to get rid of flab, you can do it with aasanas in yoga. Moreover
you don’t have to waste thousands on that expensive gym membership; yoga can be
practiced from the comfort of your home. All you need are some comfortable
clothes and a yoga mat and you are good to go. So to start you off on your
holistic weight loss journey here are some yoga exercises you can practice to
melt away the pounds.
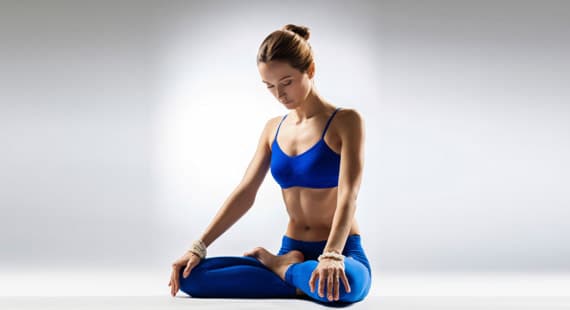
Badhakonasana:
This aasana is the best
thing you can do for your inner thighs. It the one pose in yoga that will help
you target your problem area while simultaneously strengthening your spine,
muscles of the groins, knees and lower back. It also helps relieve menstrual
discomfort and improves digestion.

Steps to do this pose: Sit on your yoga mat with your legs stretched
out in front of you. Keep your spine erect and bend your legs at the knees,
such that the soles of your feet are facing each other. Now with your hands
pull your legs in so that your heels touch each other and they are as close to
your pelvis as possible. While holding your legs at the ankles, move your
thighs up and down, just like the wings of a butterfly. Do this as many times
as you can. Remember that the closer your legs are to your pelvis the greater
the benefit of this pose. Do not push yourself, do as much as you can and your
flexibility will improve with time.
Tip: Do not do this aasana
if you have injured your knees.
Kapal bhati pranayam:
This is a form of breathing
exercise that helps to oxygenate your body while strengthening the muscles of
your stomach and abdomen. It helps in giving you that flat toned tummy, melts
away love handles and improves digestion.
Steps to do this pose: Sit
comfortably on your yoga mat. Keep your spine erect and your palms on your
knees facing downwards. Now exhale through your nose and pull your stomach in
towards your spine. When you loosen your stomach muscles you will automatically
breath in. Quickly contract your stomach muscles again and exhale. Your stomach
muscles should be doing the work of pushing out and pulling in air. Do this initially about 50 times, you can
increase the number of repetitions as you feel comfortable. After doing this
form of breathing you will initially feel some soreness around the muscles of
your stomach and abdomen. This is normal.
Tip: Avoid doing this pose
if you have high blood pressure, a hernia or heart disease.
Halasana:
This pose is great for
those who sit for long hours and tend to have bad posture. It tones the muscles
of your buttock and strengthens your shoulders and thighs. It also stimulates
the functioning of the thyroid glands, parathyroid glands, lungs and abdominal
organs, therefore helping the blood rush to your head and face, improves
digestion and keeps the hormonal levels in check.

Step to do this pose:
Lie flat on the floor on
your back with your feet flat on the floor. Place your arms by your side and
bend your knees so that your feet are flat on the floor. Now, slowly raise your
legs from the hips. Place your hands on your hips as you raise it and use them
as support. Now slowly bend your legs at the hips and try to touch the floor
behind your head with your toes and straighten your hands so they are flat on
the floor. Breath out while going up. To return to the lying position gently
roll your back onto the floor, breath in
while you come down. Do not drop down suddenly.
Tadasan:
Tadasana makes an ideal
warm up pose. It improves the circulation of blood, thereby ensuring that your
body is ready for the poses in store. Stand with your feet flat, heels slightly
spread out and big toes in contact with each other. Keep the spine erect, with
hands on either side of your body, palms facing your body.

Step to do this pose:
Stand with your feet flat,
heels slightly spread out and big toes in contact with each other. Keep the
spine erect, with hands on either side of your body, palms facing your body.
Stretch your hands to the front and join the palms. Inhaling deeply, stretch
your spine. Raising your folded hands up above your head, stretch as much as
you can. Try lifting your ankle and standing on your toes, with eyes facing the
ceiling. If you cannot stand on your toes, you can keep your feet flat on the
ground while your eyes face the ceiling. Breathe normally and hold the pose for
20 to 30 seconds. Inhale deeply and while exhaling, slowly relax and bring your
feet back to the floor. Repeat the pose 10 times, increasing the count
gradually. Relax for 10 seconds before you attempt the next repetition.
Tips: Although the Mountain Pose is an easy and
relaxing pose, there are some precautions that you must take when performing
the mountain pose. Performing this pose requires concentration, and therefore,
it is best not to attempt it when you have a headache or suffer from persistent
migraines. You should also avoid performing this pose if you have insomnia or
any other sleep related disorder because it can cause alertness and prevent you
from sleeping easily. This pose is also contraindicated for those who suffer
from blood circulation problems such as faulty valves and low blood pressure.
Balasana:
Known quite aptly as the
child’s pose this is a great stress buster. It gently stretches the hips,
thighs, ankles, calms the mind and helps relieve stress and fatigue. It is also
a great remedy for that lower back pain you might have from long hours of sitting.
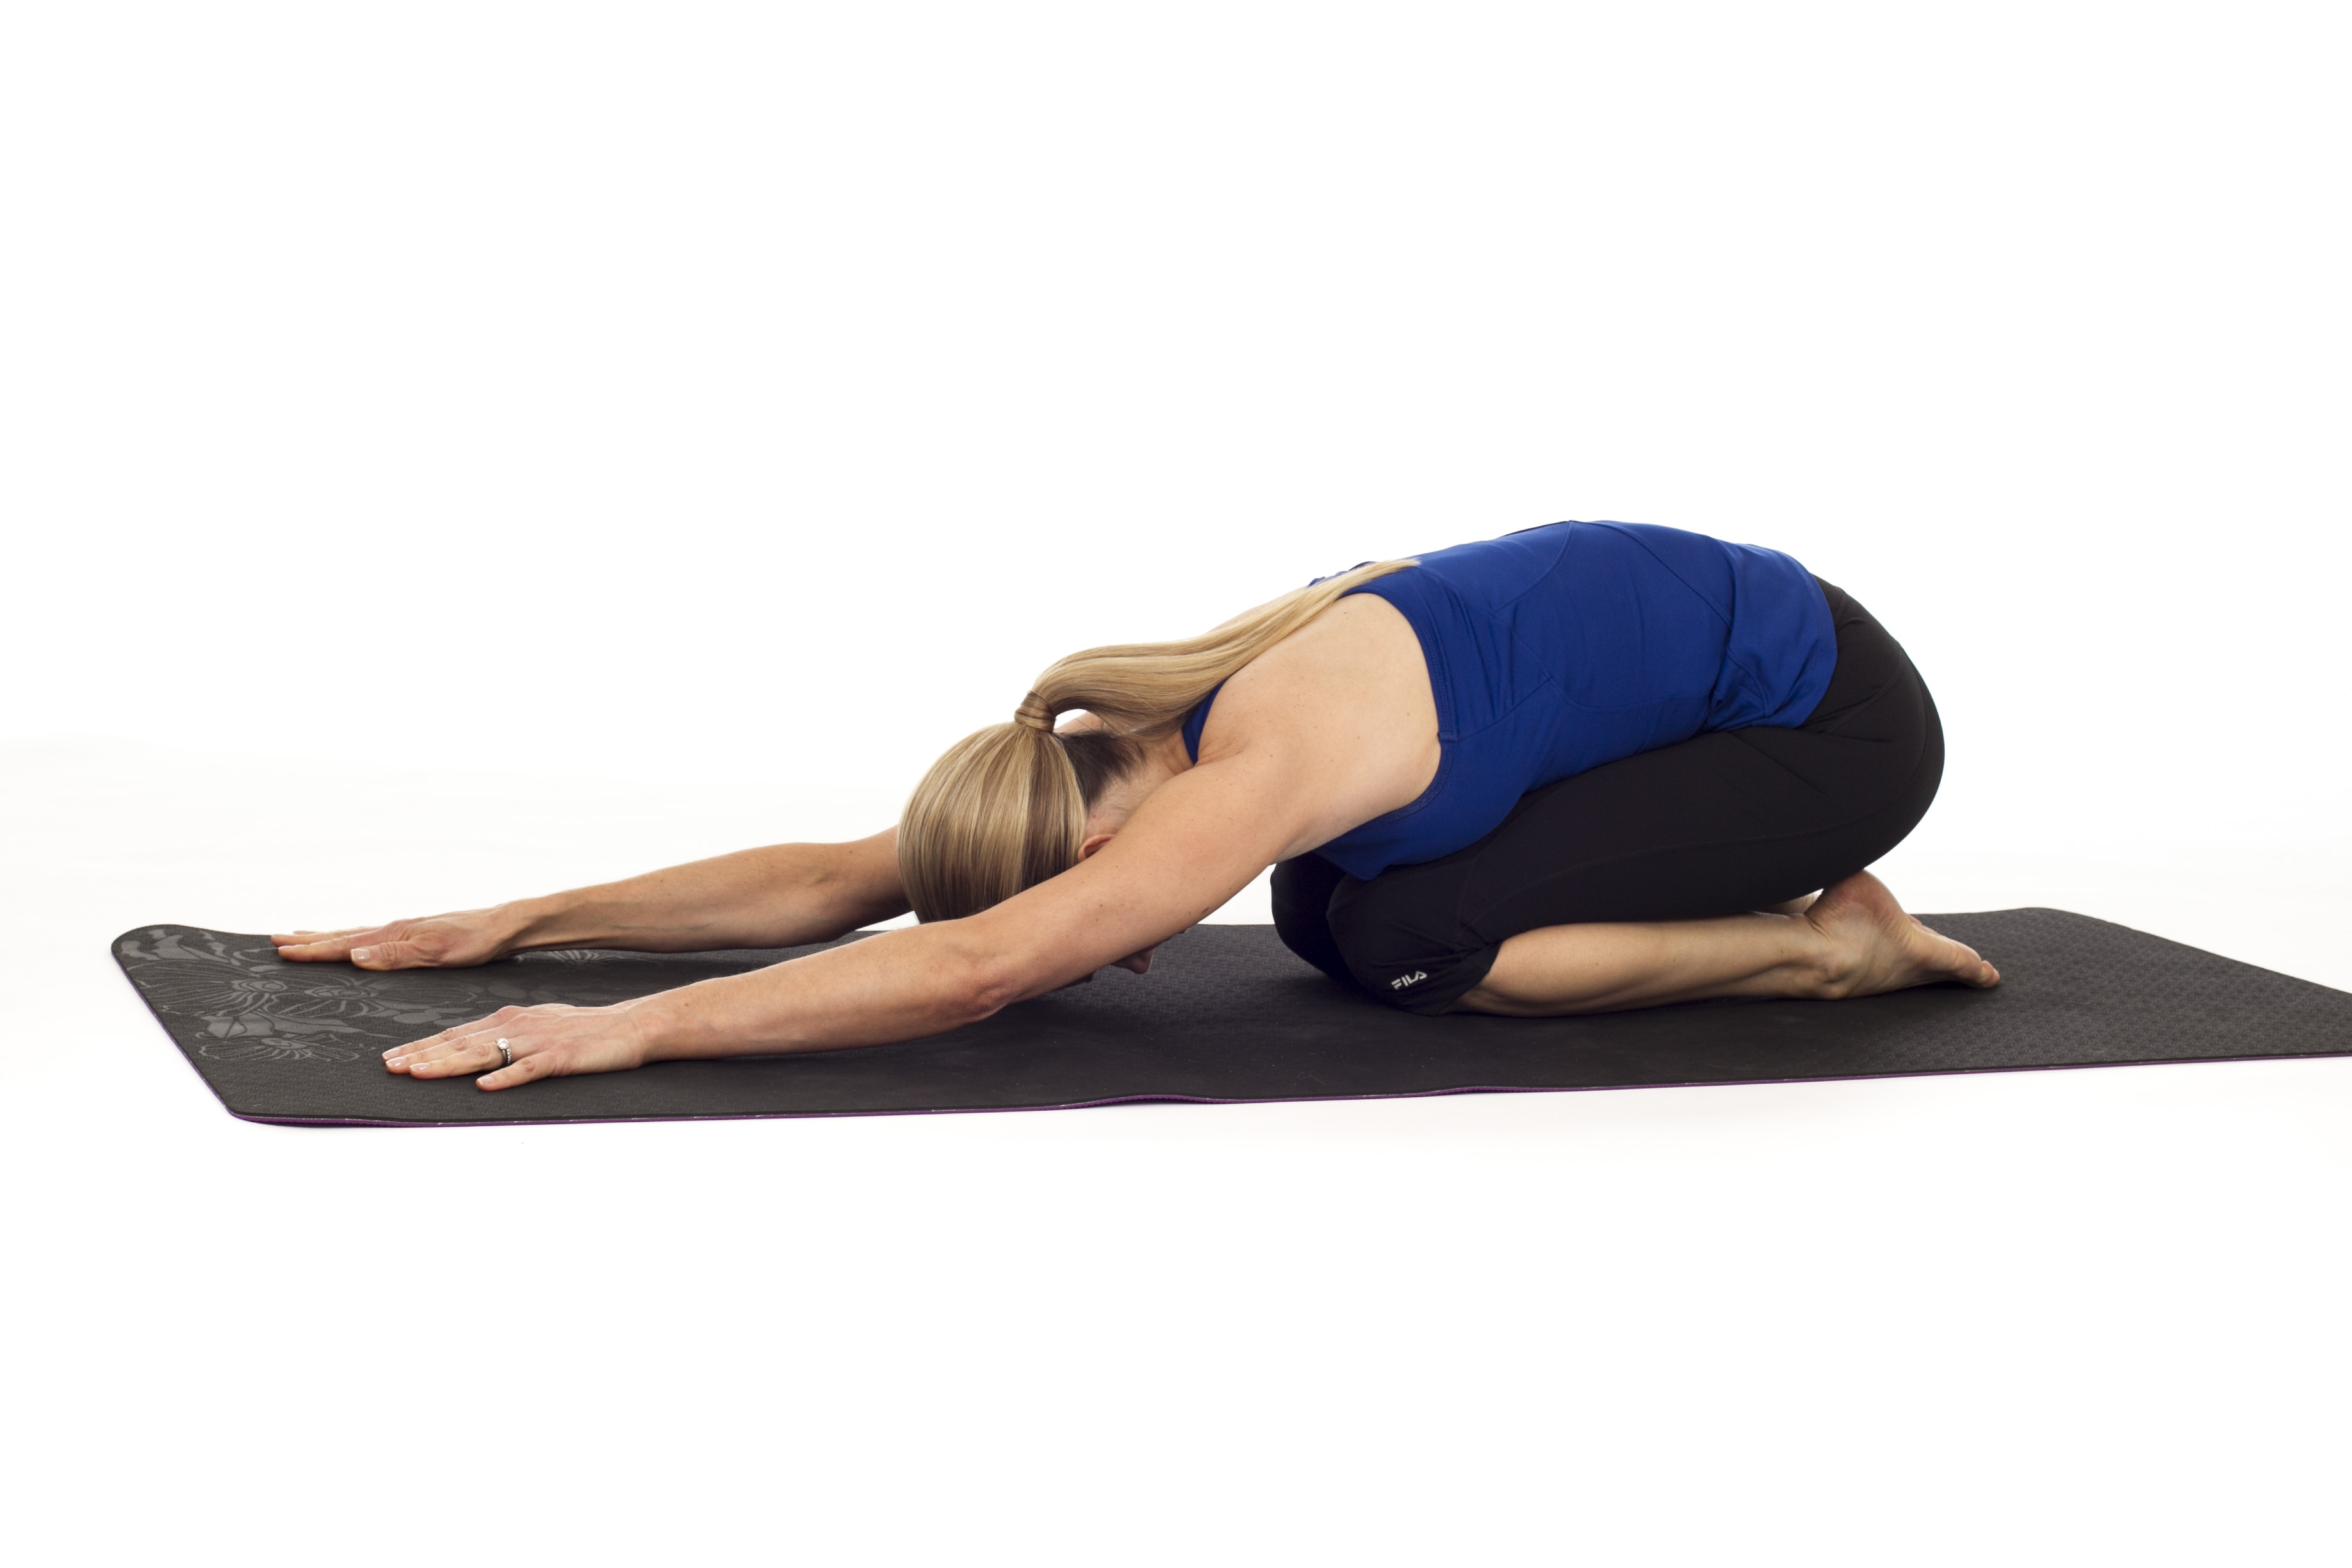
Step to do the pose:
Sit on the floor with your
weight on your knees. Now flatten your
feet onto the floor and sit on your
heels. Spread your thighs apart a little. Exhale and bend forward from your
waist. Let your stomach rest on your thighs and extend your back. Now stretch
out your arms in front of you to elongate the back. You can also rest your
forehead on the floor. This may require flexibility, so don’t push your body
beyond its permissible limit. It will get better with time.
This is a resting pose so
you should ideally breath at a normal pace. You can stay in this pose for as
long as three minutes and as little as five counts.
Tip: If you are pregnant,
have a knee injury or have diarrhoea do not do this pose.
Utkatasana:
Also known as the chair
pose this aasanarequires concentration and focus on the muscles being used. It
strengthens the core muscles, thighs and tones the buttocks.

Steps to do this pose:
Stand straight on your yoga mat with your hands in namaste in front of you. Now
raise your hands above your head and bend at the knee such that your thighs are
parallel to the floor. Bend your torso slightly forward and breathe. Stay in
this position for as long as you can. In order to get out of this pose, gently
stand up.
Tip: Do not do this pose if
you have a knee injury or back injury.
Veerbhadrasana 1:
Literally meaning the
warrior pose, this aasana stretches your
back, strengthens your thighs, buttock and tummy. It also helps in making you
more focused and opens up your chest so you can breathe better. This is an
excellent pose to melt away the fat from your midsection.
Steps to do this pose:


Stand on your yoga mat with
your feet together and hands by your side. Now extend your right leg forward
and keep your left leg extended backwards. Now, gently bend your right knee so
that you get into the lunge position. Twist your torso to face your bent right
leg. Slightly turn your left foot sideways (about 400-600) to give you that extra support. Exhale,
straighten your arms and raise your body up and away from your bent knee.
Stretch your arms upwards and slowly tilt your torso backwards so your back
forms and arch. Stay in this pose for as long as you feel comfortable. Breathe
normally. To get out of this pose exhale and straighten your right knee. Now
push off your right leg and come back to your original position. You can use
your hands to support you. Do not rush out of this pose; you might injure your
back or legs. Repeat thisaasana for the other leg as well.
Tip: If you have high blood
pressure, shoulder, knee or back trouble, please perform this pose under the
guidance of a trained teacher.
Setubandhasana:
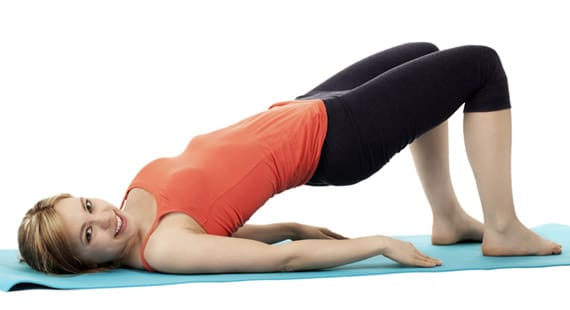
Steps to do this pose: Lie
flat on your yoga mat, with your feet flat on the floor. Now exhale and push
up, and off the floor with your feet. Raise your body up such that your neck
and head are flat on the mat and the rest of your body is in the air. You can
use your hands to push down for added support. If you are flexible you can even
clasp your fingers just below your raised back for that added stretch. The key
here is to not overexert or hurt yourself while doing this pose.
Tip: Avoid doing this pose
if you have a neck or back injury.
Uttanasana:
This is a forward bending
pose that stretches out the hamstrings, and the muscles of the abdomen. It also
makes the blood rush to your head, helping your body switch from the
sympathetic to the parasympathetic nervous system, helping you relax.

Steps to do this pose:
To perform this pose, stand
straight. Raise your hands from the front to above your head as you inhale
slowly. Then bend forward completely pushing your buttocks back till your palms
touch the floor and your forehead touches your knees. If you cannot bend
completely, or are uncomfortable with the stretch on your hamstrings, bend your
knees a little. Stay in this pose till you are comfortable.. To return back to
the standing position, as you inhale slowly bring your arms above your head,
raising your upper body. Then as you exhale bring your arms down from front of
your face. Do not jerk up. Remember to rise up from the hips, without straining
your muscles.
Surya Namaskar:
Surya Namaskar essentially,
is a confluence of twelve yoga positions, each of which has a major impact on
the entire body. The forward and backward bends allow stretches, while deep
breathing performed during the act helps in detoxification. Practice Surya
Namaskar daily in the morning facing the sun for reaping the maximum benefits.

Step to do this pose:
The picture given above
gives you a comprehensive and vivid view of how one needs to perform this
energetic yoga pose.
Start off slowly, with five
rounds, increasing the counts gradually over time. Make sure that you keep a
bottle of water with you. Take a sip after each repetition and relax for 15
seconds between repetitions so that you are not worn out.
Uttanpadasana (Raised Foot Pose):
This pose helps in getting
rid of the fat from your lower abdominal region as well as hips, and thighs.
This pose is one of the most efficient and effective ways to eliminate the flab
that gets accumulated around your waist and hips during pregnancy.

Step to do this pose:
Lie down on the mat with
your back on the floor, legs stretched out and heels touching each other. Keep
your hands on either side of your body, palms facing the ground. Inhale deeply
and exhaling slowly, tilt your back while bringing your head backwards so that
it touches the floor. Do not move your hands from their initial position.
Breathe normally. Stretch to the maximum possible level, without hurting your
back. Taking a deep inhalation, raise your legs from the floor, making a
45-degree angle with the floor. Hold the pose for a period of 15 to 30 seconds,
breathing normally. Slowly workout to hold the posture for more than 60
seconds. Take a deep exhalation and lift your legs so that it makes a 90-degree
angle with the floor. Breathing normally, hold the posture for 30 seconds.
Inhaling deeply, bring your legs back gradually to initial position – the
supine position. Repeat this pose for 10 times to begin with, working up to 30
times gradually. Relax for 15 seconds after each repetition.
Bhujangasana:
Give your abdomen a good
stretch with this yoga asana. The regular practice of this pose aids in
strengthening the back muscles, and hence, is one of the most advised poses to
alleviate post-partum back pain.

Step to do this pose:
Lie down on the mat in
prone position, legs slightly spaced out, and toes touching the floor. Keep the
hands on either side of the body, palms facing the floor. Bring your palms
beneath your shoulders. Taking a deep inhalation slowly lift your chest and
head off the floor, your gaze fixed on the ceiling. Tuck in your pubis towards
your navel, whiling holding your buttocks firm. Hold the position for a period
of 15 to 30 seconds, while breathing normally. Take a deep breath and try to
lift your body from the waist upward, bending backward as much as possible.
Nevertheless, make sure that you are not hurting your back in the process. Hold
the posture for 30 to 60 seconds, breathing normally. Exhale and slowly bring
your body down – chest, neck, and forehead – to return to the prone position.
Stretch your arms slowly to the front. Repeat this pose for 10 times to begin
with, working up to 30 times gradually. Relax for 15 seconds after each
repetition.
A word of caution: Bend
backward only till you experience the stretch on your abdomen, thighs, and
backs. Please relax even if you experience a slight pain while stretching. In
such cases, you can do just Ardha Bhujangasana.
Comments
Post a Comment